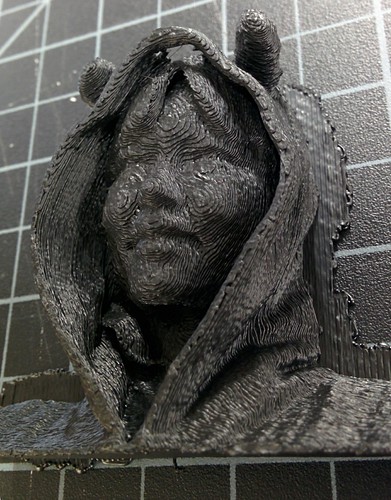
Back in September, at Science Hack Day, Matthew Bennett created a 3D model of me (thank you Matthew!) and I finally had a chance to 3D print it. It's very rough since I wanted to experiment so the settings are speed>quality and size is small, but I think it was a good experiment ;)
==Preparation and Tools==
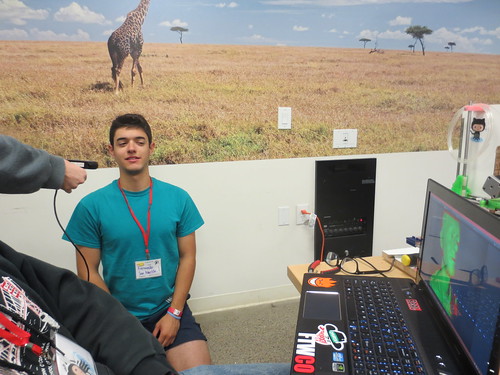
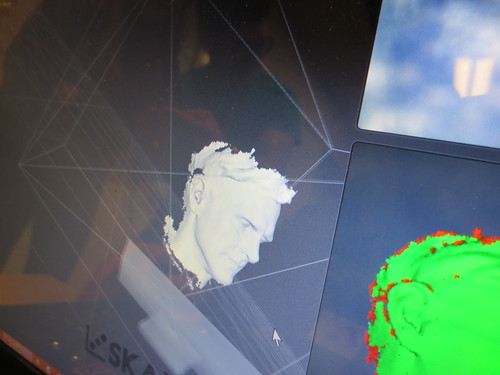
Primesense Carmine
-This is a 3D sensor, which is actually used in various devices such as Kinect.

You can hold it up so that you can scan yourself, or have someone scan you. What you are capturing is sent to your computer in real time, so you can actually see what you are capturing.
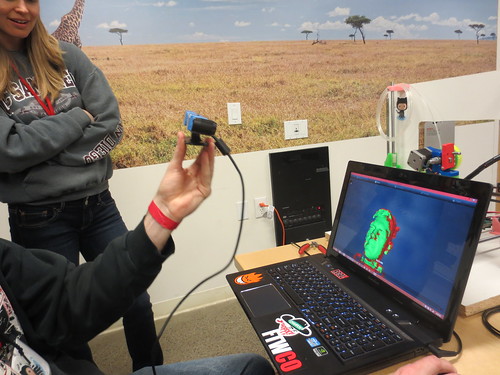
SKANECT
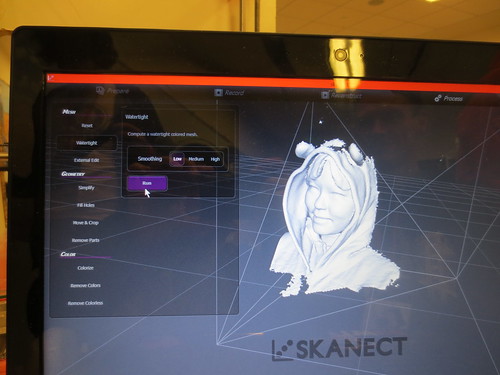
-3D scanning software. This app can export file in various file formats, which is awesome. I got it exported as .stl file this time.
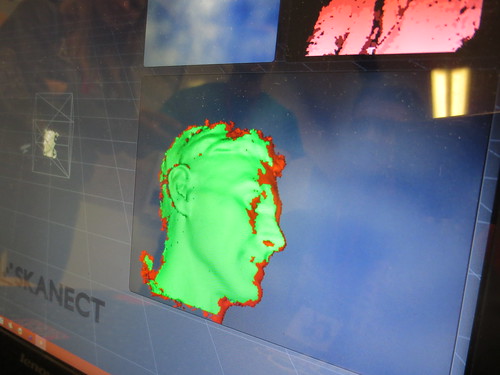
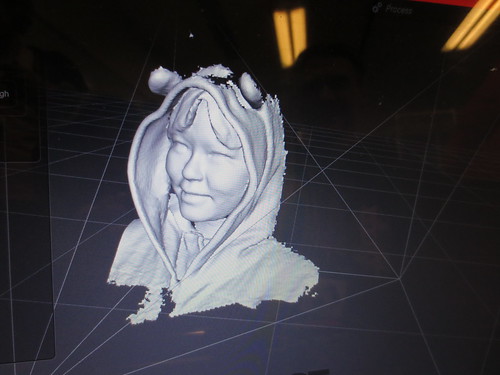
So I scanned myself as well- though I can't take a picture of me when I'm scanning myself ;) and this is the output. We cut off the head in half since we don't need the back part, we should've done a better job getting the top of my head but we can clean it up later with data.
Makerware
I use either Makerware or ReplicatorG when I do 3D printing. This time, I simply used Makerware. The data was extremely small when it was sent to me, so I scaled it, but not too big since I didn't want to take up too much time.
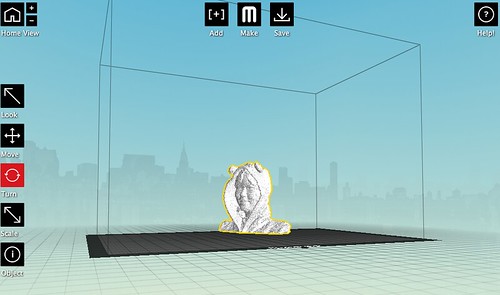
This is my first data, which is in the orientation of which the data I received was, to give it a try.
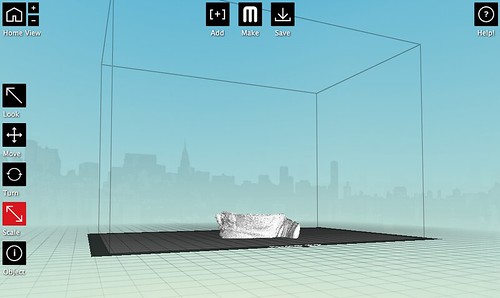
Then I rotated it so that the back of the head (flat cut part) will be the bottom- for the second print.
MakerBot
As usual, I use Makerbot to print.

==Printing==
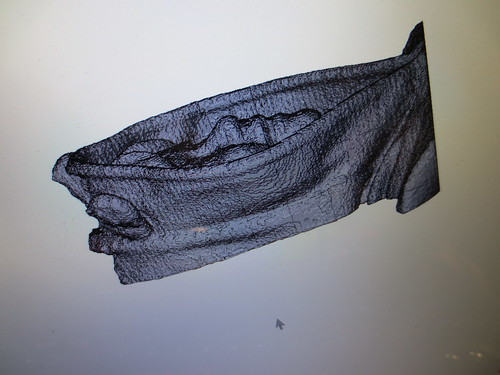
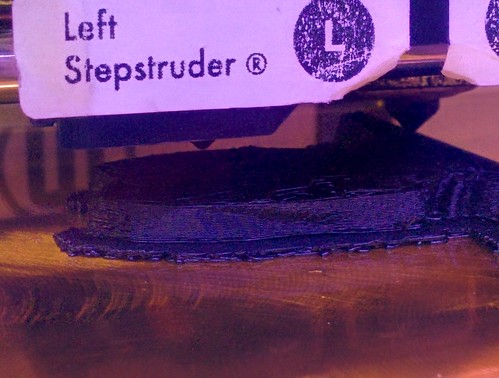
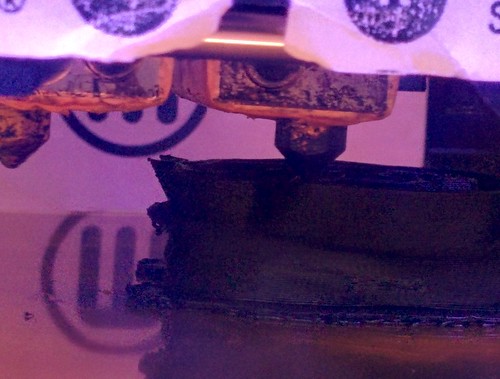
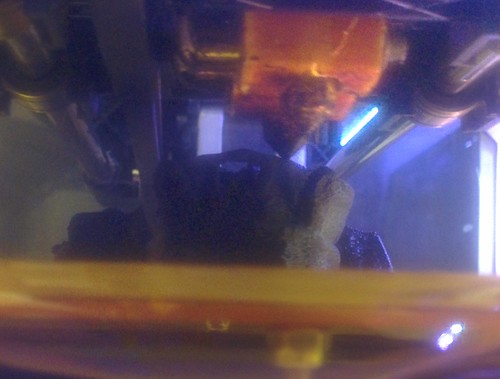
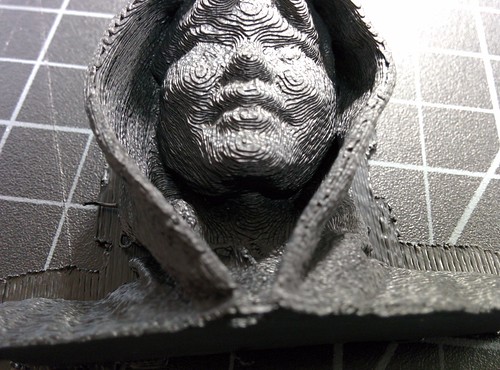
First print- horizontal orientation. I knew from the beginning this is not the best thing to do, but gave it a try. Also, the printing is low quality since I decreased quality to increase speed. When I clean the data and make it nicer, I might do a better quality print.
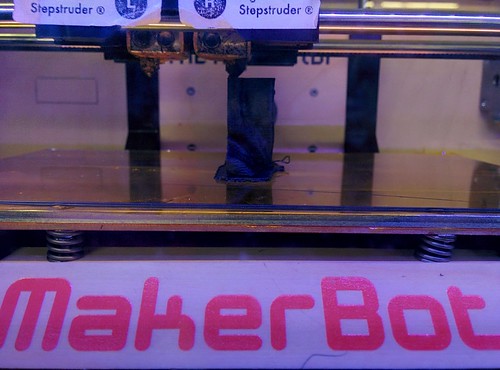
When 3D printing, if you don't have something beneath an object it is hard to print, since there is nothing that would support it and you will be printing in the air. This time, my chin was in the air so the filaments were getting tangled in the air like a spring. (And if you are making something like that, you can make a support object beneath what you want to print so that it won't dangle.)

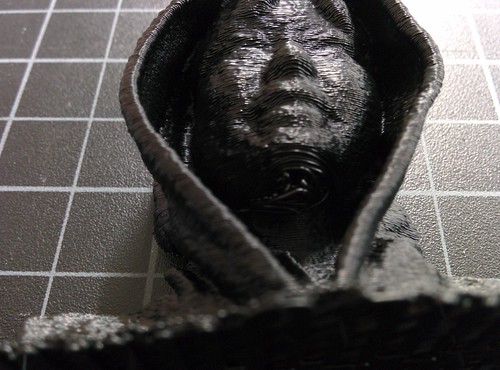
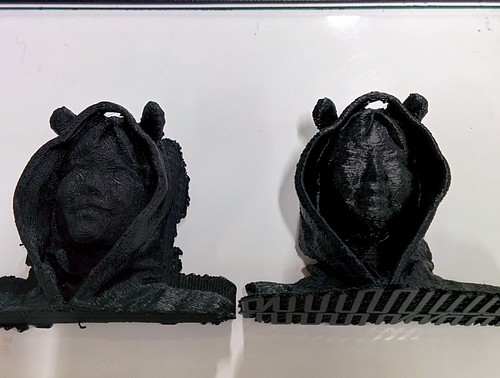
Hole in the hoodies, precisely as I had a hole in the data, so that's good.

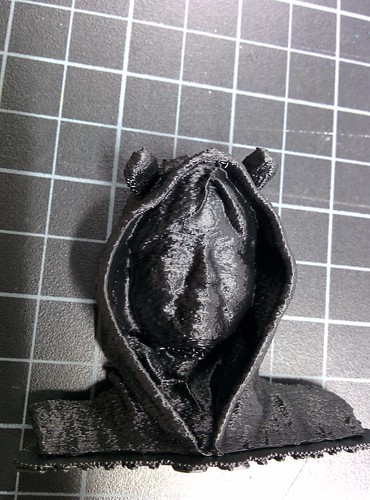
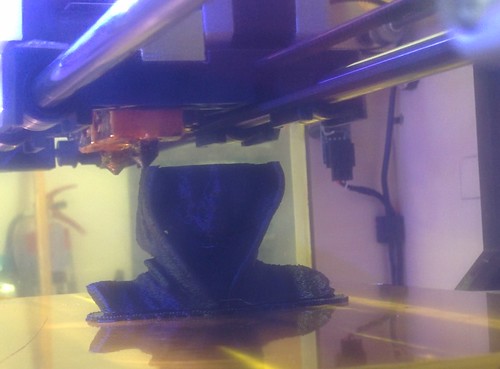
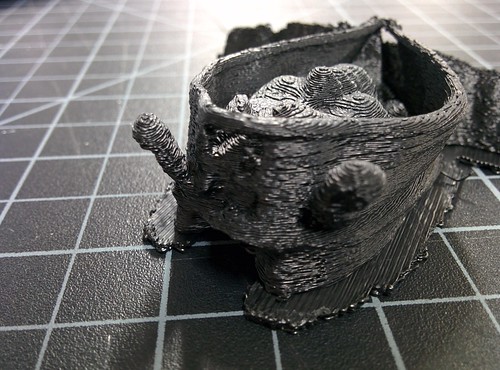
OK, next I will print the same data, with a same printer, same filament in vertical orientation.

No more dangling cheeks here so that's good.
Hole in the hoodies is captured well too, and the Android ear on the hoodies didn't dangle so that was a success as well. (I was actually expecting it might just dangle.)
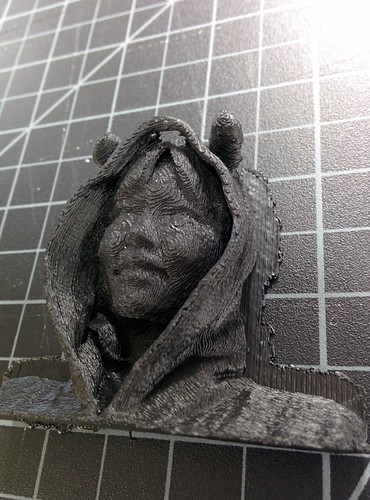
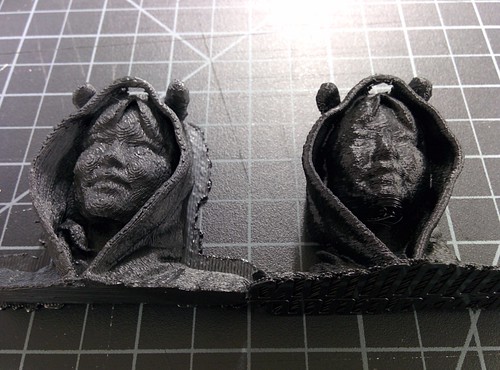
To me, what was interesting was how the 2 products looked differently despite it was using the same data, same printer, and same filament.
In the horizontal one, my face is much skinnier, the color of the filament is black whereas the other one looks more like grey, horizontal one is much more shinier, and of course the layers are horizontal vs vertical which makes my face look like a mountain on the vertical one, etc... it really looked different. (Hard to tell from the photos!)
Disclaimer: The opinions expressed here are my own, and do not reflect those of my employer. -Fumi Yamazaki
==Preparation and Tools==
Primesense Carmine
-This is a 3D sensor, which is actually used in various devices such as Kinect.
You can hold it up so that you can scan yourself, or have someone scan you. What you are capturing is sent to your computer in real time, so you can actually see what you are capturing.
SKANECT
-3D scanning software. This app can export file in various file formats, which is awesome. I got it exported as .stl file this time.
So I scanned myself as well- though I can't take a picture of me when I'm scanning myself ;) and this is the output. We cut off the head in half since we don't need the back part, we should've done a better job getting the top of my head but we can clean it up later with data.
Makerware
I use either Makerware or ReplicatorG when I do 3D printing. This time, I simply used Makerware. The data was extremely small when it was sent to me, so I scaled it, but not too big since I didn't want to take up too much time.
This is my first data, which is in the orientation of which the data I received was, to give it a try.
Then I rotated it so that the back of the head (flat cut part) will be the bottom- for the second print.
MakerBot
As usual, I use Makerbot to print.
==Printing==
First print- horizontal orientation. I knew from the beginning this is not the best thing to do, but gave it a try. Also, the printing is low quality since I decreased quality to increase speed. When I clean the data and make it nicer, I might do a better quality print.
When 3D printing, if you don't have something beneath an object it is hard to print, since there is nothing that would support it and you will be printing in the air. This time, my chin was in the air so the filaments were getting tangled in the air like a spring. (And if you are making something like that, you can make a support object beneath what you want to print so that it won't dangle.)
Hole in the hoodies, precisely as I had a hole in the data, so that's good.
OK, next I will print the same data, with a same printer, same filament in vertical orientation.
No more dangling cheeks here so that's good.
Hole in the hoodies is captured well too, and the Android ear on the hoodies didn't dangle so that was a success as well. (I was actually expecting it might just dangle.)
To me, what was interesting was how the 2 products looked differently despite it was using the same data, same printer, and same filament.
In the horizontal one, my face is much skinnier, the color of the filament is black whereas the other one looks more like grey, horizontal one is much more shinier, and of course the layers are horizontal vs vertical which makes my face look like a mountain on the vertical one, etc... it really looked different. (Hard to tell from the photos!)
Disclaimer: The opinions expressed here are my own, and do not reflect those of my employer. -Fumi Yamazaki
0 件のコメント:
コメントを投稿